


How Superhero Design uses an Interact Quiz for selling website templates
This quiz is for anyone with a Showit site (or any website for that matter) that needs an easy quiz solution to capture leads or make more sales.
Since the beginning of my existence as a web designer, one of the questions I get a lot is “What’s the best quiz for my business?” Of course everyone wants to know what’s the best option, you’d be a little off to ask for anything other than that.
But I didn’t have a great answer. The most common solution was to send people live examples of what other companies were doing, which was great, but then the immediate question was – sooo how do I build a quiz like that?
That one stumped me for many years, until I had time to build up a portfolio of quiz templates that anyone can use to create their own quiz.
What I did was to create a quiz to help people find the right template so they can not only answer the question of “Which Quiz is Best for My Business?” but also solve the problem of building the quiz because once you find a template you can copy it right into your interact account (or start a trial to use the template).
I now use the quiz as a primary drive for new lead generation and customer acquisition.
Here’s what it looks like.

How to Embed Your Quiz into Showit
Step 1: Login to Showit and open the site you want to embed your quiz onto.

Step 2: Click on the area of the page you want to embed the quiz. Then click the
middle icon at the bottom of the page and select “Embed Code” from the dropdown list. This is where your quiz will appear; resize and/or move the frame as desired.

Step 3: Open your interact dashboard and click “Share & Embed” on your quiz you want to add to the Showit landing page.

Step 4: Click on “Embed Code” on the left sidebar, and click the “Javascript” tab.
Step 5: Toggle on the buttons for “Auto resize embed to fit quiz content” and “Use custom embed size” then change the width of the dimensions to 1,500.

Step 6: Click “Copy Code” then go back to Showit and double click in the embed code frame you just created.
Step 7: Paste the embed code into the Showit embed box. The embed code starts with <div. Immediately after that add align=”center” so it appears: <div align=”center” to center the quiz on all devices regardless of screen size.

Step 8: Click “Save.”
Preview your quiz on mobile and desktop to make sure everything functions as desired.

Here are some examples of what YOUR QUIZ might look like…
Example: When someone takes the quiz we ask them about where they are at in the quiz journey as well as what industry they are in and what tools they use for email marketing and website so we can help them build their quiz.
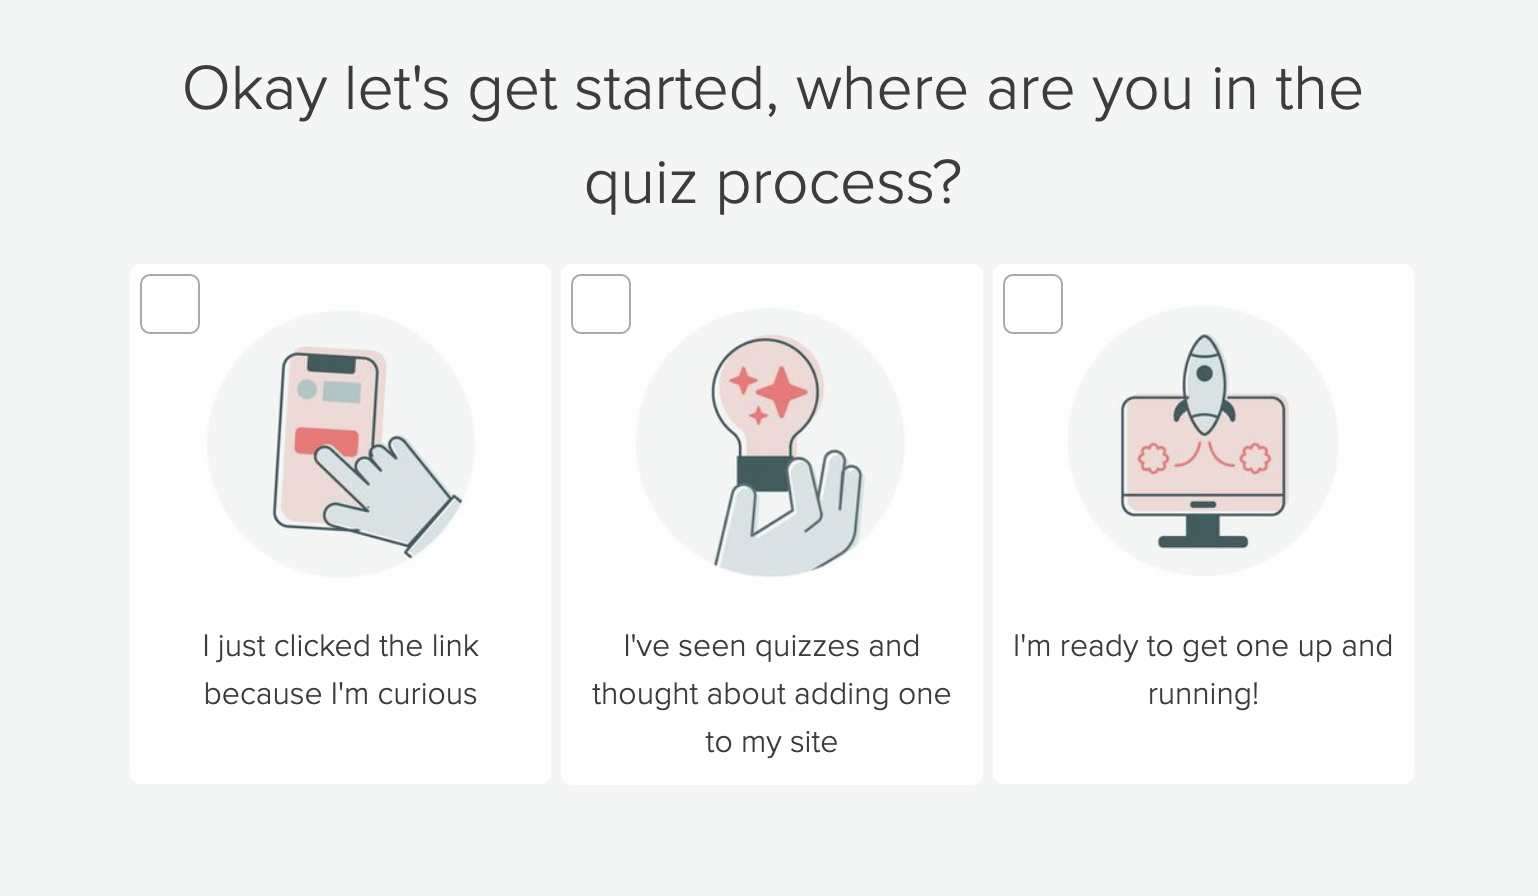
To help point people in the right direction we ask them about what industry they’re in so we can surface templates that will be most helpful to them.

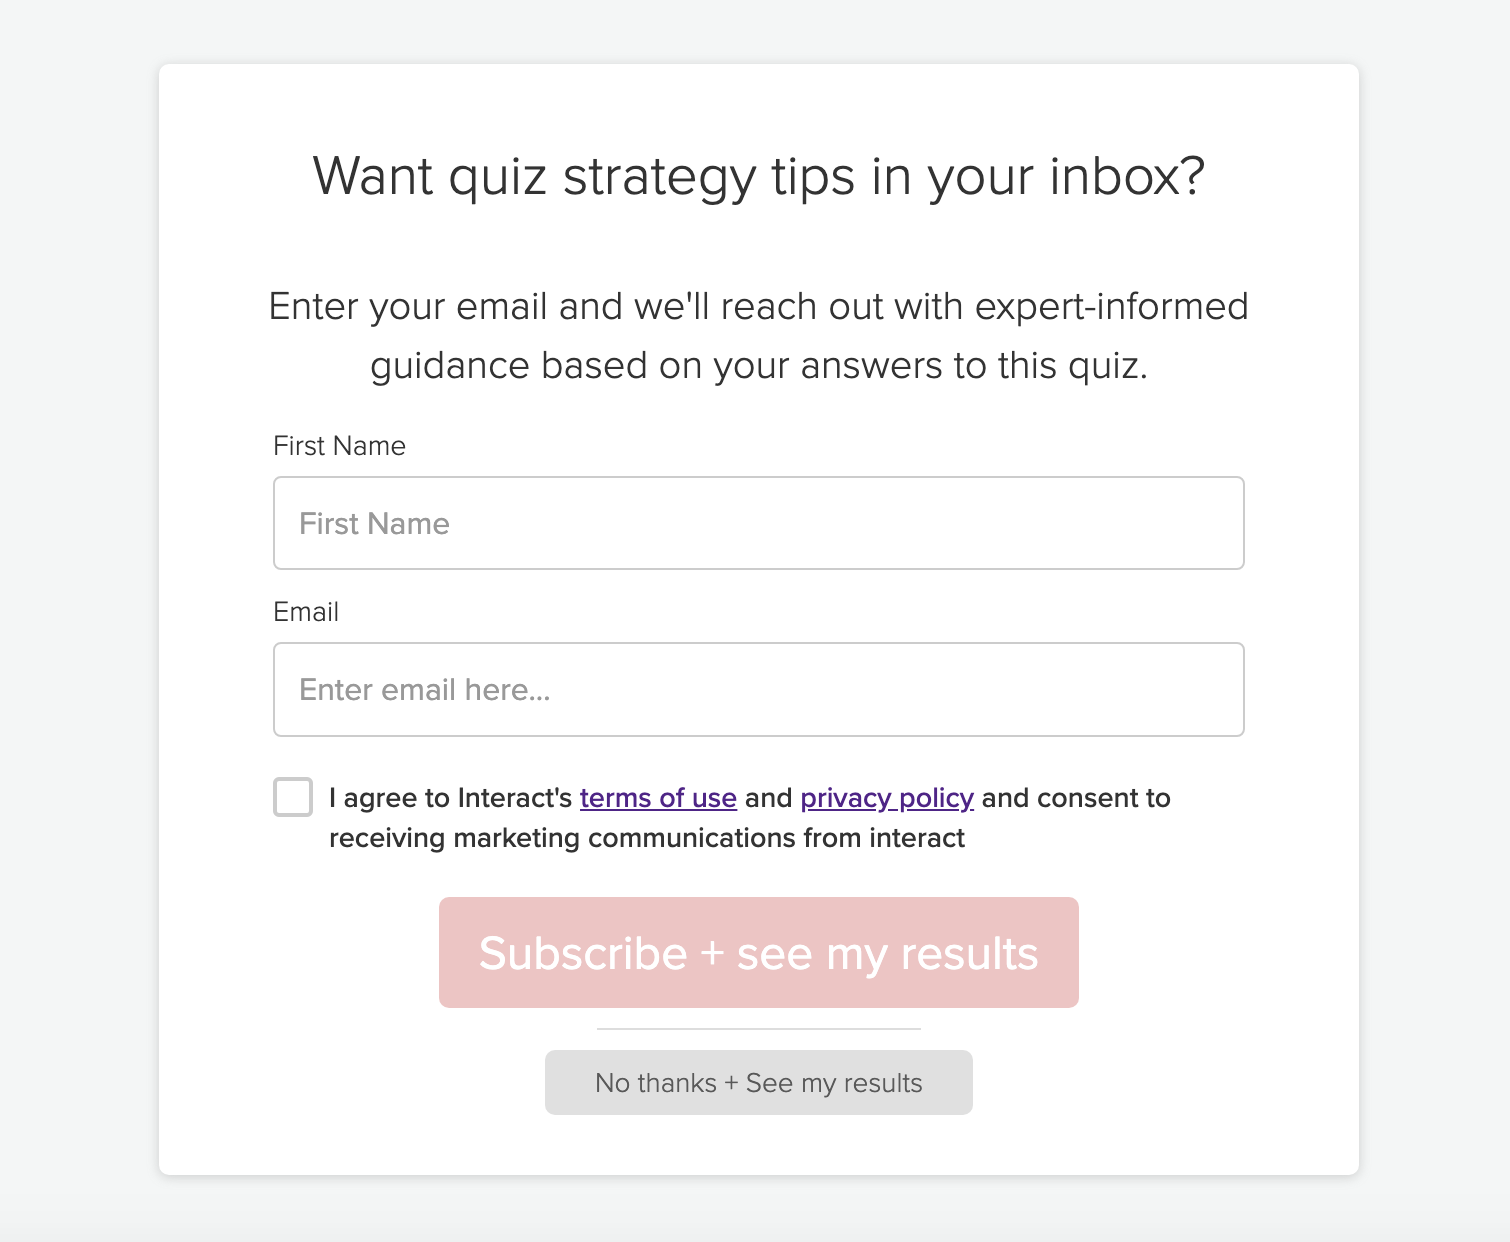
Example: At the end of the quiz we have an opt-in form if anyone would like quiz tips via email. This form converts at 15% which is amazing for the software industry (the overall average is 40.8% but software is a different world since it’s B2B)
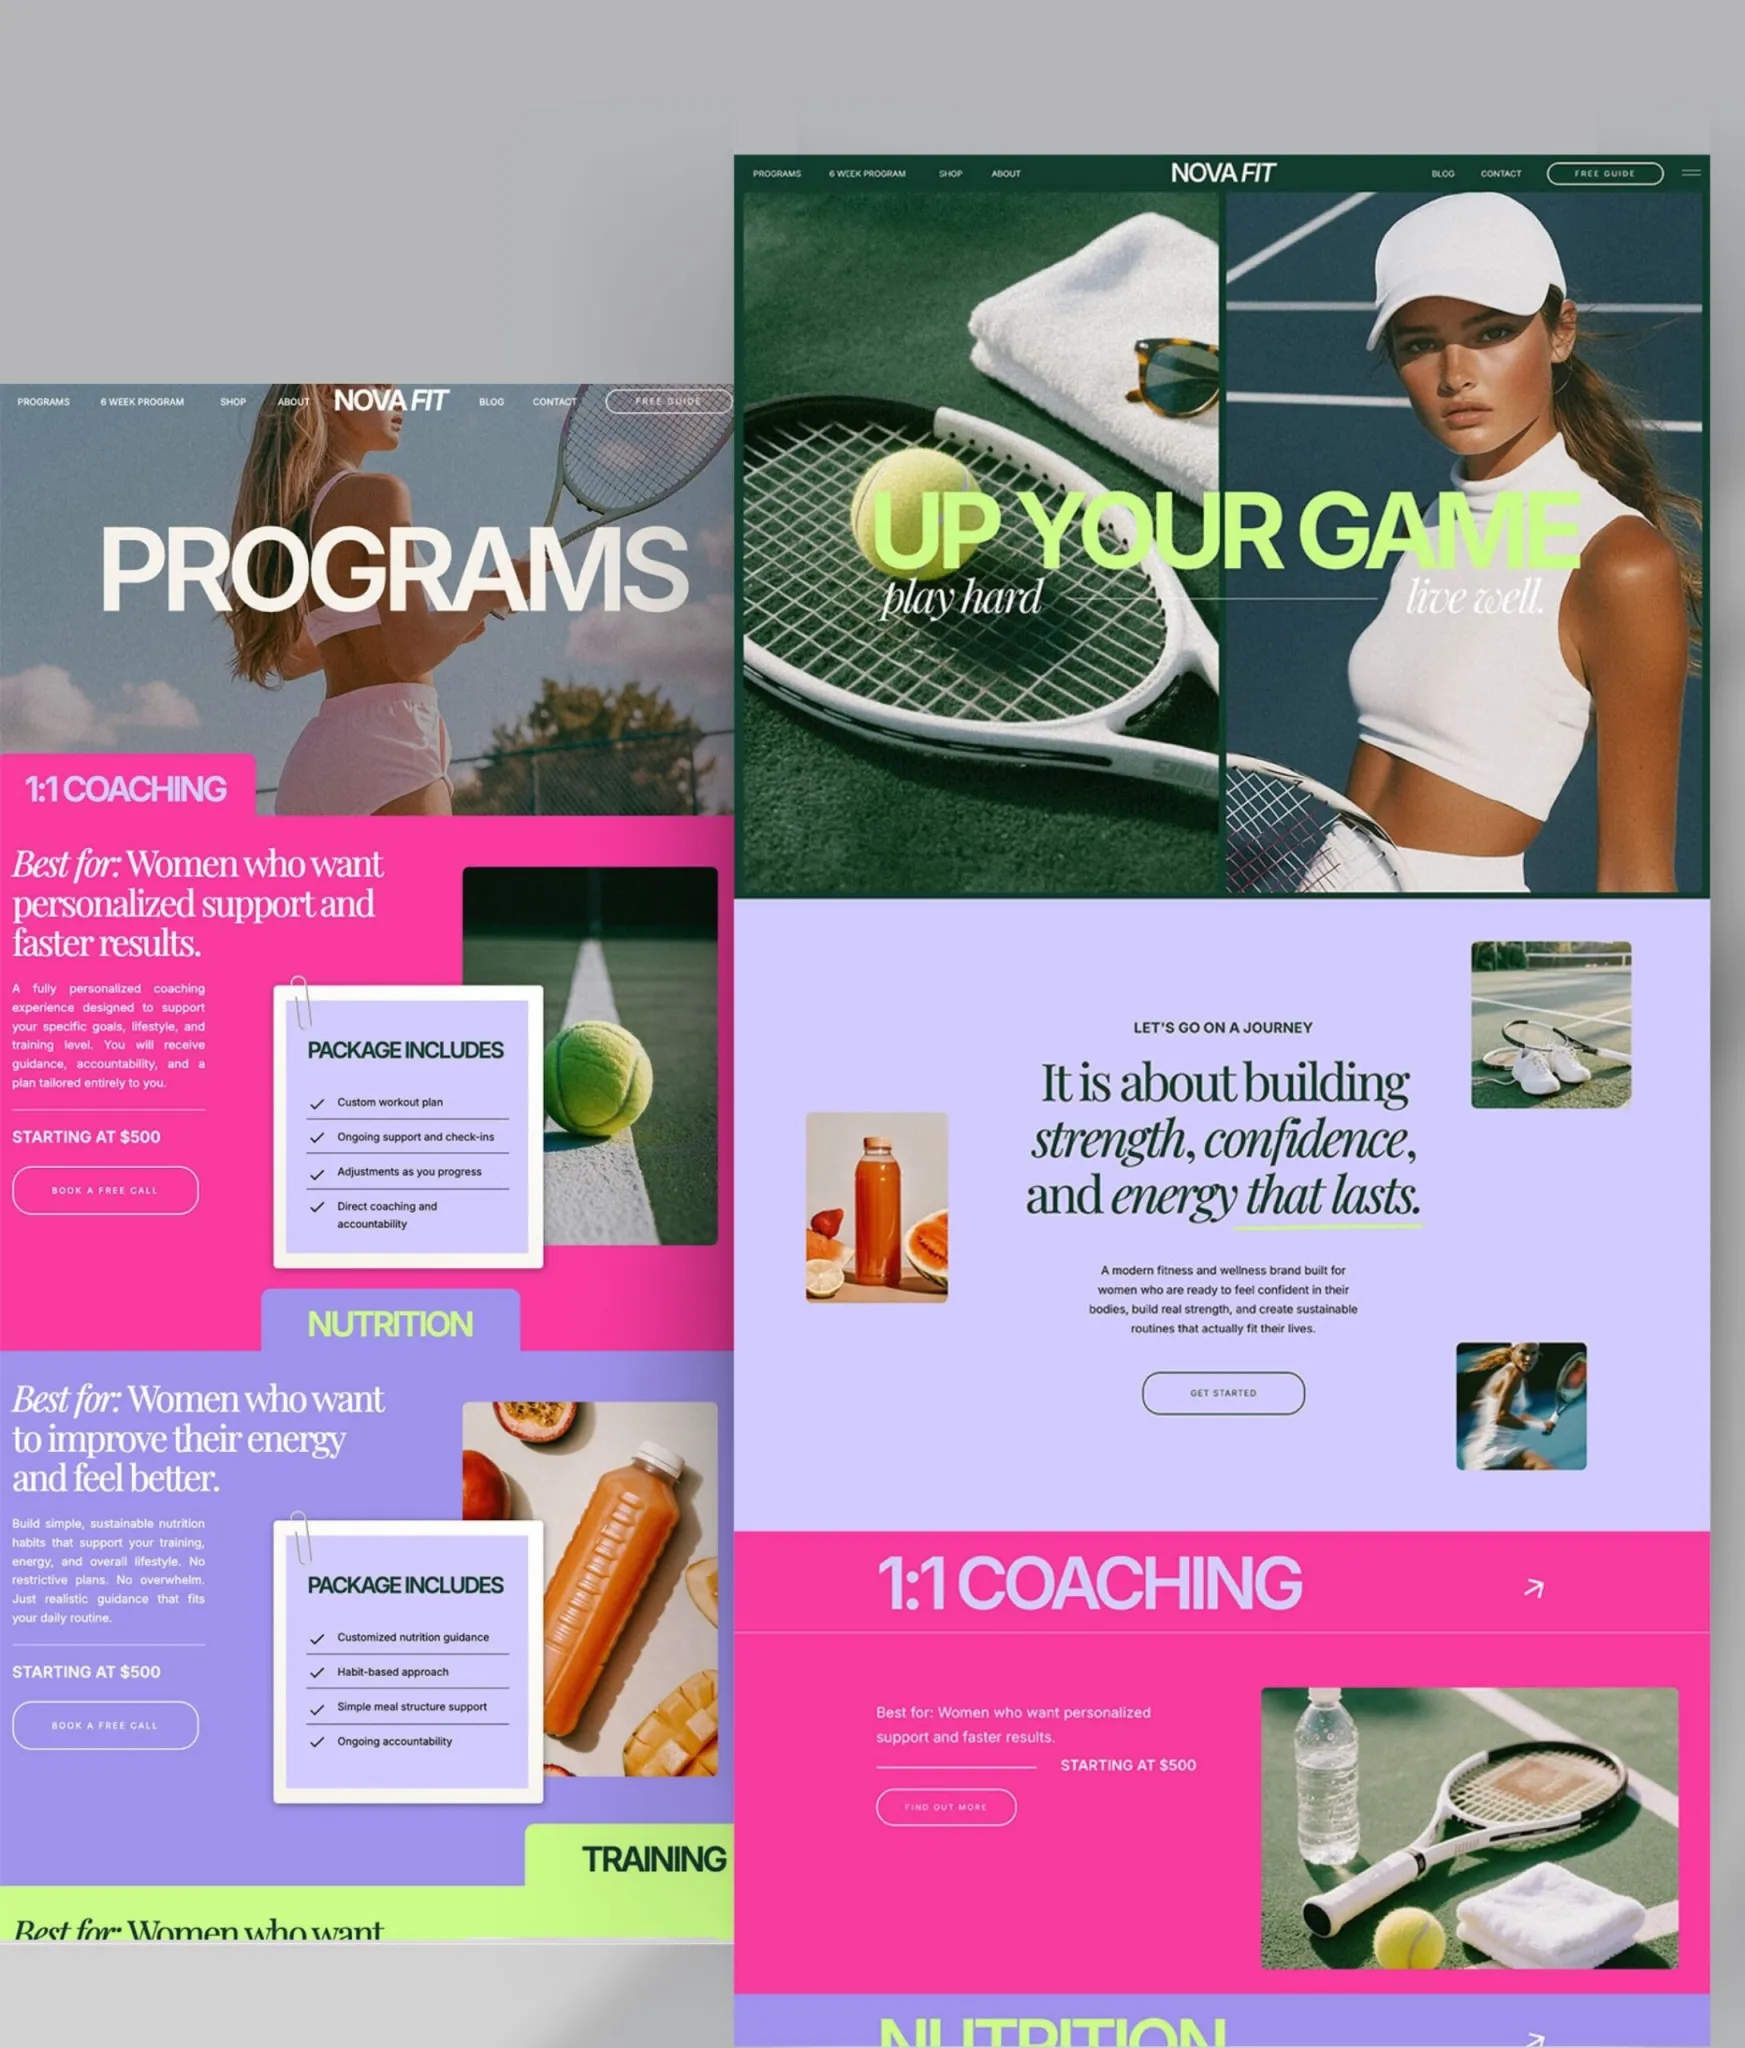
Example: After someone opts in or skips we show them their recommended quiz templates, we choose three for each result and then have a button to check out all templates in a category of nothing matches what they’re looking for.

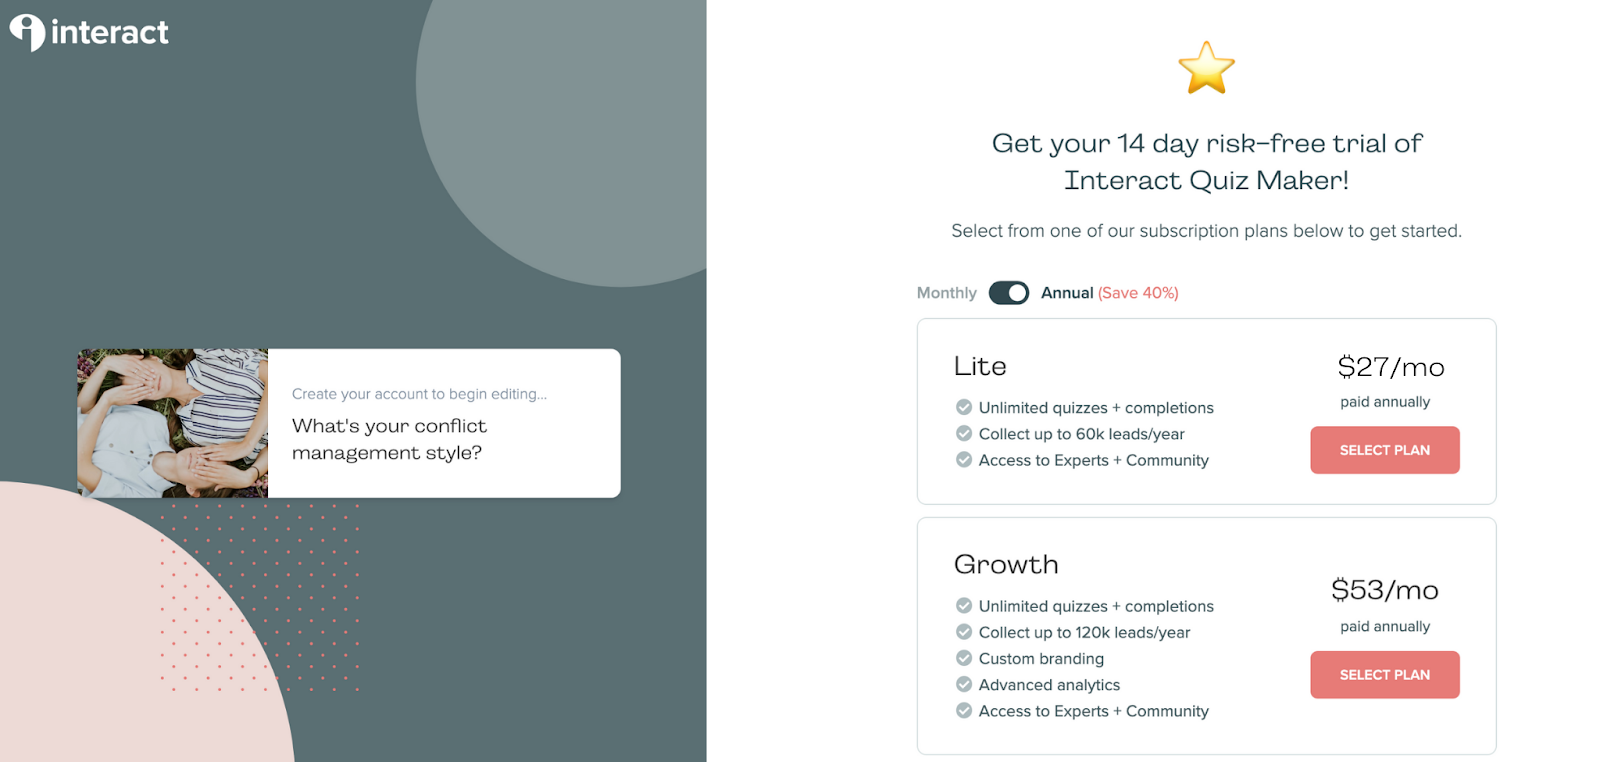
Example: If the quiz taker likes any of the templates we recommend, they can click the “Use this template” link and go check it out on a new page which looks like this.

If they like that template after previewing it, they can click “Use this template” which will prompt them to start a free trial and copy the template into their account (for existing customers it just copies straight into their account).
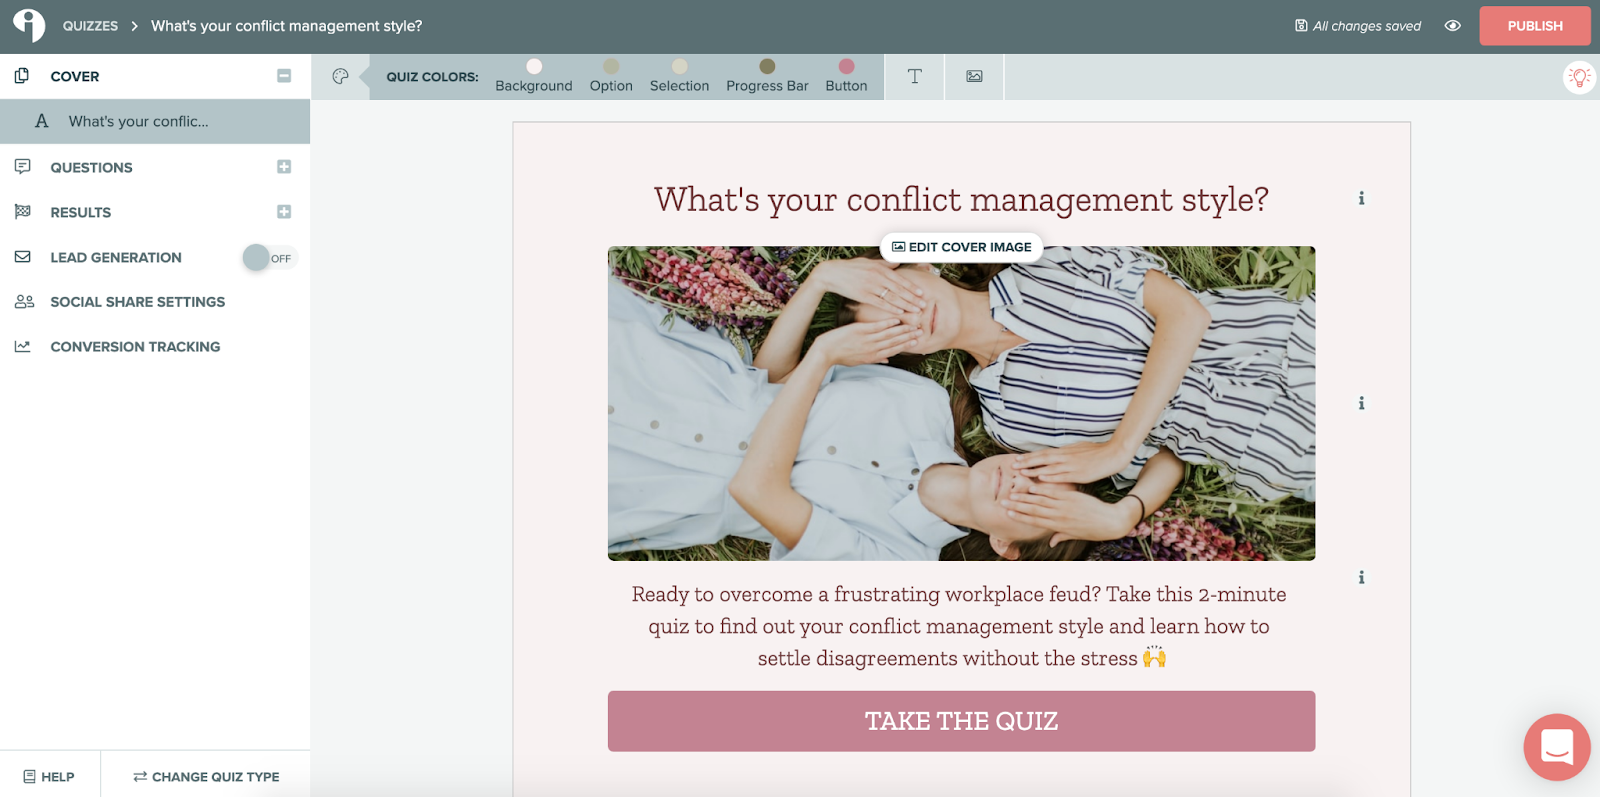
Then the quiz loads into your account and you can edit, connect to your email list, and publish. This takes the quiz building process from several weeks at best down to an hour or two, and answers the biggest question our customers have because we’re showing you the best quiz for your business.
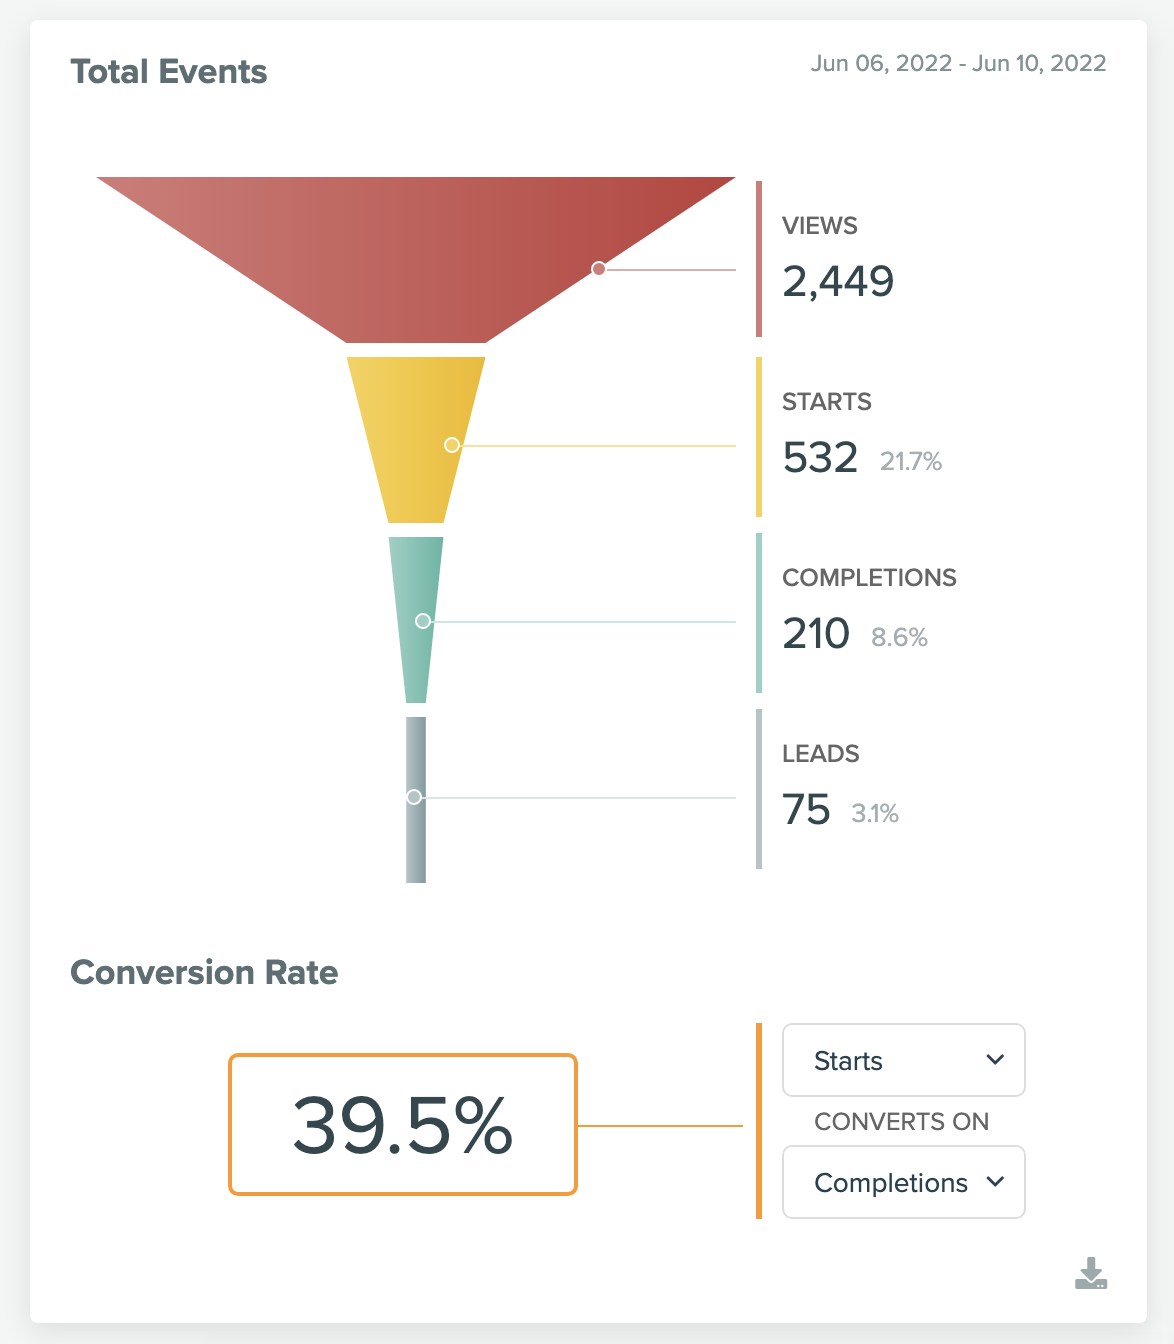
Results: How the quiz is performing
Example: We’ve only been running this quiz for one week, it has collected 75 leads and led directly to 8 paid signups. It’s only just in test mode and soon we’ll send a lot more traffic through it. (The reason there are so many views is that we have it as a popup on our blog, which gets a lot of views but most people aren’t the right fit which is totally fine).
Conclusion:
Example: Sitting here writing this I’m blown away by how well the quiz works. We’ve effectively created the highest-performing lead magnet interact has ever had by a factor of 2x, and it actually leads to paid signups directly, not to mention the people who are opting in and may buy down the road.
I can now truly empathize with all of the customers I’ve spoken with over the years who have put off making a quiz, we created the first commercially available quiz builder and it took us 10 years to actually put our own quiz in place.
Hopefully now with this quiz in place, plus all the ready-to-use templates you won’t have to wait ten years and can have a quiz up and running in 10 minutes instead!
Curious to try out our quiz recommender quiz? Check it out at tryinteract.com/start

Melissa Lunt is the founder of Superhero Design, a template shop specializing in high-converting Showit website templates for coaches, photographers, and creative entrepreneurs. With over 10 years of experience designing brands and websites, she helps business owners launch beautiful, strategic sites without the designer price tag or tech stress. Melissa is passionate about creating handcrafted templates that don’t just look custom—they actually book clients. When she’s not designing, you’ll find her drinking coffee, spending time with family and exploring the outdoors.
Explore Showit templates and launch resources at superherodesign.co.


Comments +